My first memory of sourdough bread was a Sourdough Jack at Jack-in-the-Box. As a kid, I found the sourness of the bread distasteful. Recently, I found myself intrigued by the abundance of sourdough loaves popping up on my Instagram feed and wanted to find out what the fuss was about.
Now, I am by no means a sourdough expert. My relationship with bread making is a fairly young one and I’ve always relied on either dried yeast or fresh bakers yeast. The fact that I had to ferment flour to create a natural leavening agent seriously put me off in the beginning. I have now been apart of the sourdough lovers team for a couple months and wanted to let you in on my process.
It took me a while to figure out how to make my own starter. The first one molded on me. The second dried out. But after some trial and error and lots of reading, I finally creating a starter which I managed to keep alive!
History of Sourdough
Sourdough was the only way to get a raised bread before commercialized yeast became available. The earliest known evidence of sourdough was found in Switzerland and dates back to 3700 BC. Can you believe that commercialized yeast has only been available for the last 150 years?
Sourdough fell out of popularity in many English speaking countries because it was slowly replaced barm (foam obtained during the beer making process) then by cultured yeast after Louis Pasteur confirmed germ theory. However, artisan bread making has been making a comeback in the recent years.
Sourdough Starter
So what exactly is a sourdough starter and how can I make one at home? A sourdough starter consists of a mixture of flour and water. This is left to ferment, allowing natural yeast and a bacteria called lactobacilli to make their home in it.
Sourdough, as it’s name entails, gives the bread a sour and tangy flavor. Each starter that is made is unique. If you’re in Washington, your starter will not be the same as someone in New York, or Paris. Apparently, San Francisco is known for their sourdough because the wild yeast in salty air makes a great starter. The starter will also differ due to the flour and water that you use.
To create a starter, you’ll need about a week or two. In a a large glass jar, combine equal parts of filtered water and flour. Leave it at room temperature, lightly covered until you start to see bubbles on the top. This may take anywhere from 24-48 hours. Then you’ll repeat the process, adding equal parts of water and flour, mixing thoroughly and letting it sit. You can put a rubber band on the outside of the jar to track the growth.
Then every 12-24 hours, when the starter has at least doubled, discard half of it and then feed it once more. When you think the starter is good and ready to go, you can take a spoonful and drop it in a glass of water. If it floats, it’s ready to go. If not, continue to feed it until it passes the test.
Afterwards, you can put it in the fridge, feeding it once a week. Prior to baking a loaf, you’ll need to wake up your starter, by feeding it and leaving it at room temperature for two days.

Leaven
The leaven is ultimately what’s added into the dough and is the only leavening in the dough. Every recipe varies, however it is generally about a tablespoon of starter to a specific amount of flour and water. In the end, it is a less poignant version of your starter.
I make my leaven the evening prior to making my dough and let it sit on the counter overnight, lightly covered with plastic wrap. When I wake up in the morning, it is bubbly and smells a lot like vinegar. When you’re first starting out, you can do the float test to make sure it’s ready. After a couple loaves, you’ll know when what you want just by the look and smell.
Autolyse
With your leaven ready, add it to a large bowl with the water and mix dissolved. Now you’re going to mix in your flour, combining the two until there are no dry patches left. Cover and place in a warm spot for about half hour. Then add the salt. As the salt is used as a flavor agent, it’s important to use a good quality salt and not just table salt. I used fleur de sel. The salt will be sprinkled over the dough, then with slightly wet hands, pinching the dough to incorporate it. Then pull the dough from the edges of the bowl and fold into the middle. Continue until you have gone all the way around the bowl.
Bulk fermentation
Over the next 3-4 hours, the dough will proof. During the proofing period, we are going to start to fold the dough, using the coil method. With moist hands, gently lift the dough from the top third section, allowing the ends to fold underneath the middle part. Repeat with the other side of the dough, so both ends are now tucked underneath. Repeat ever 30 to 45 minutes.
Proofing Baskets
Prior to jumping into bread making, I would strongly suggest investing in a proofing basket. You can get them for about 20-30 euros and they aid immensely in the final shaping of the loaf.
If you aren’t sure you’ll stick with or enjoy bread making, you can mimic the use of a proofing basket with a bowl or colander lined with a clean dish towel. In this case, be sure to generously cover the dish towel with flour to keep the dough from sticking.
When the dough has finished its bulk fermentation, you’ll need to pre-shape it, then transfer it to the proofing basket. I double wrap my basket in plastic bags, then let it sit in the fridge overnight.
Baking Time!
Prior to making my coffee in the morning, I preheat my oven to 250°c/500°f with my dutch oven inside. After an hour, it’s time to prep and score the bread for baking.
Placing a round of parchment paper on top of the dough, followed by a cutting board, then flip it over so the dough comes on onto the parchment paper.
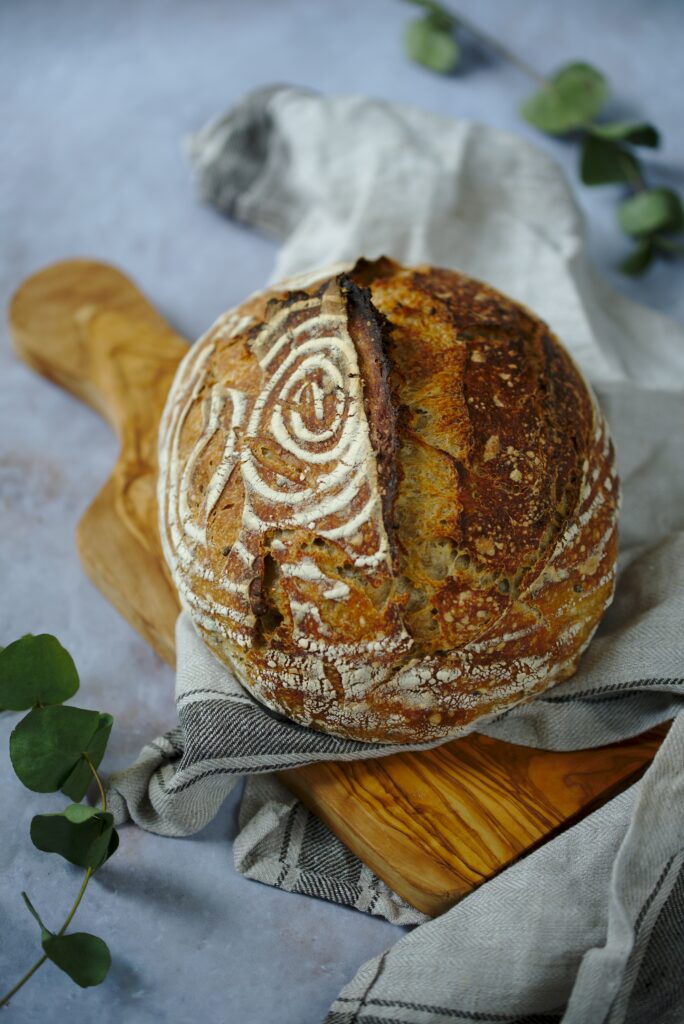
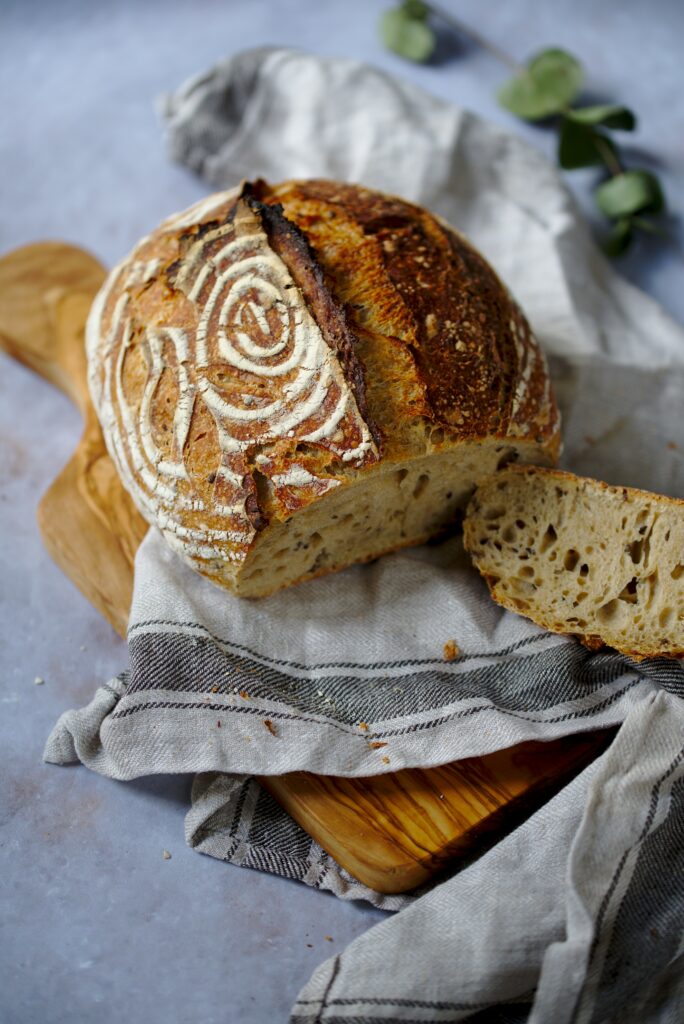
Using a sharp knife or scoring razor, create one large score, then add any decorative scoring if desired. Using the parchment paper, transfer the dough to the now hot dutch oven. Let it bake covered for 25 minutes, then bake for an additional 25 minutes uncovered, to release the stream and brown the bread.
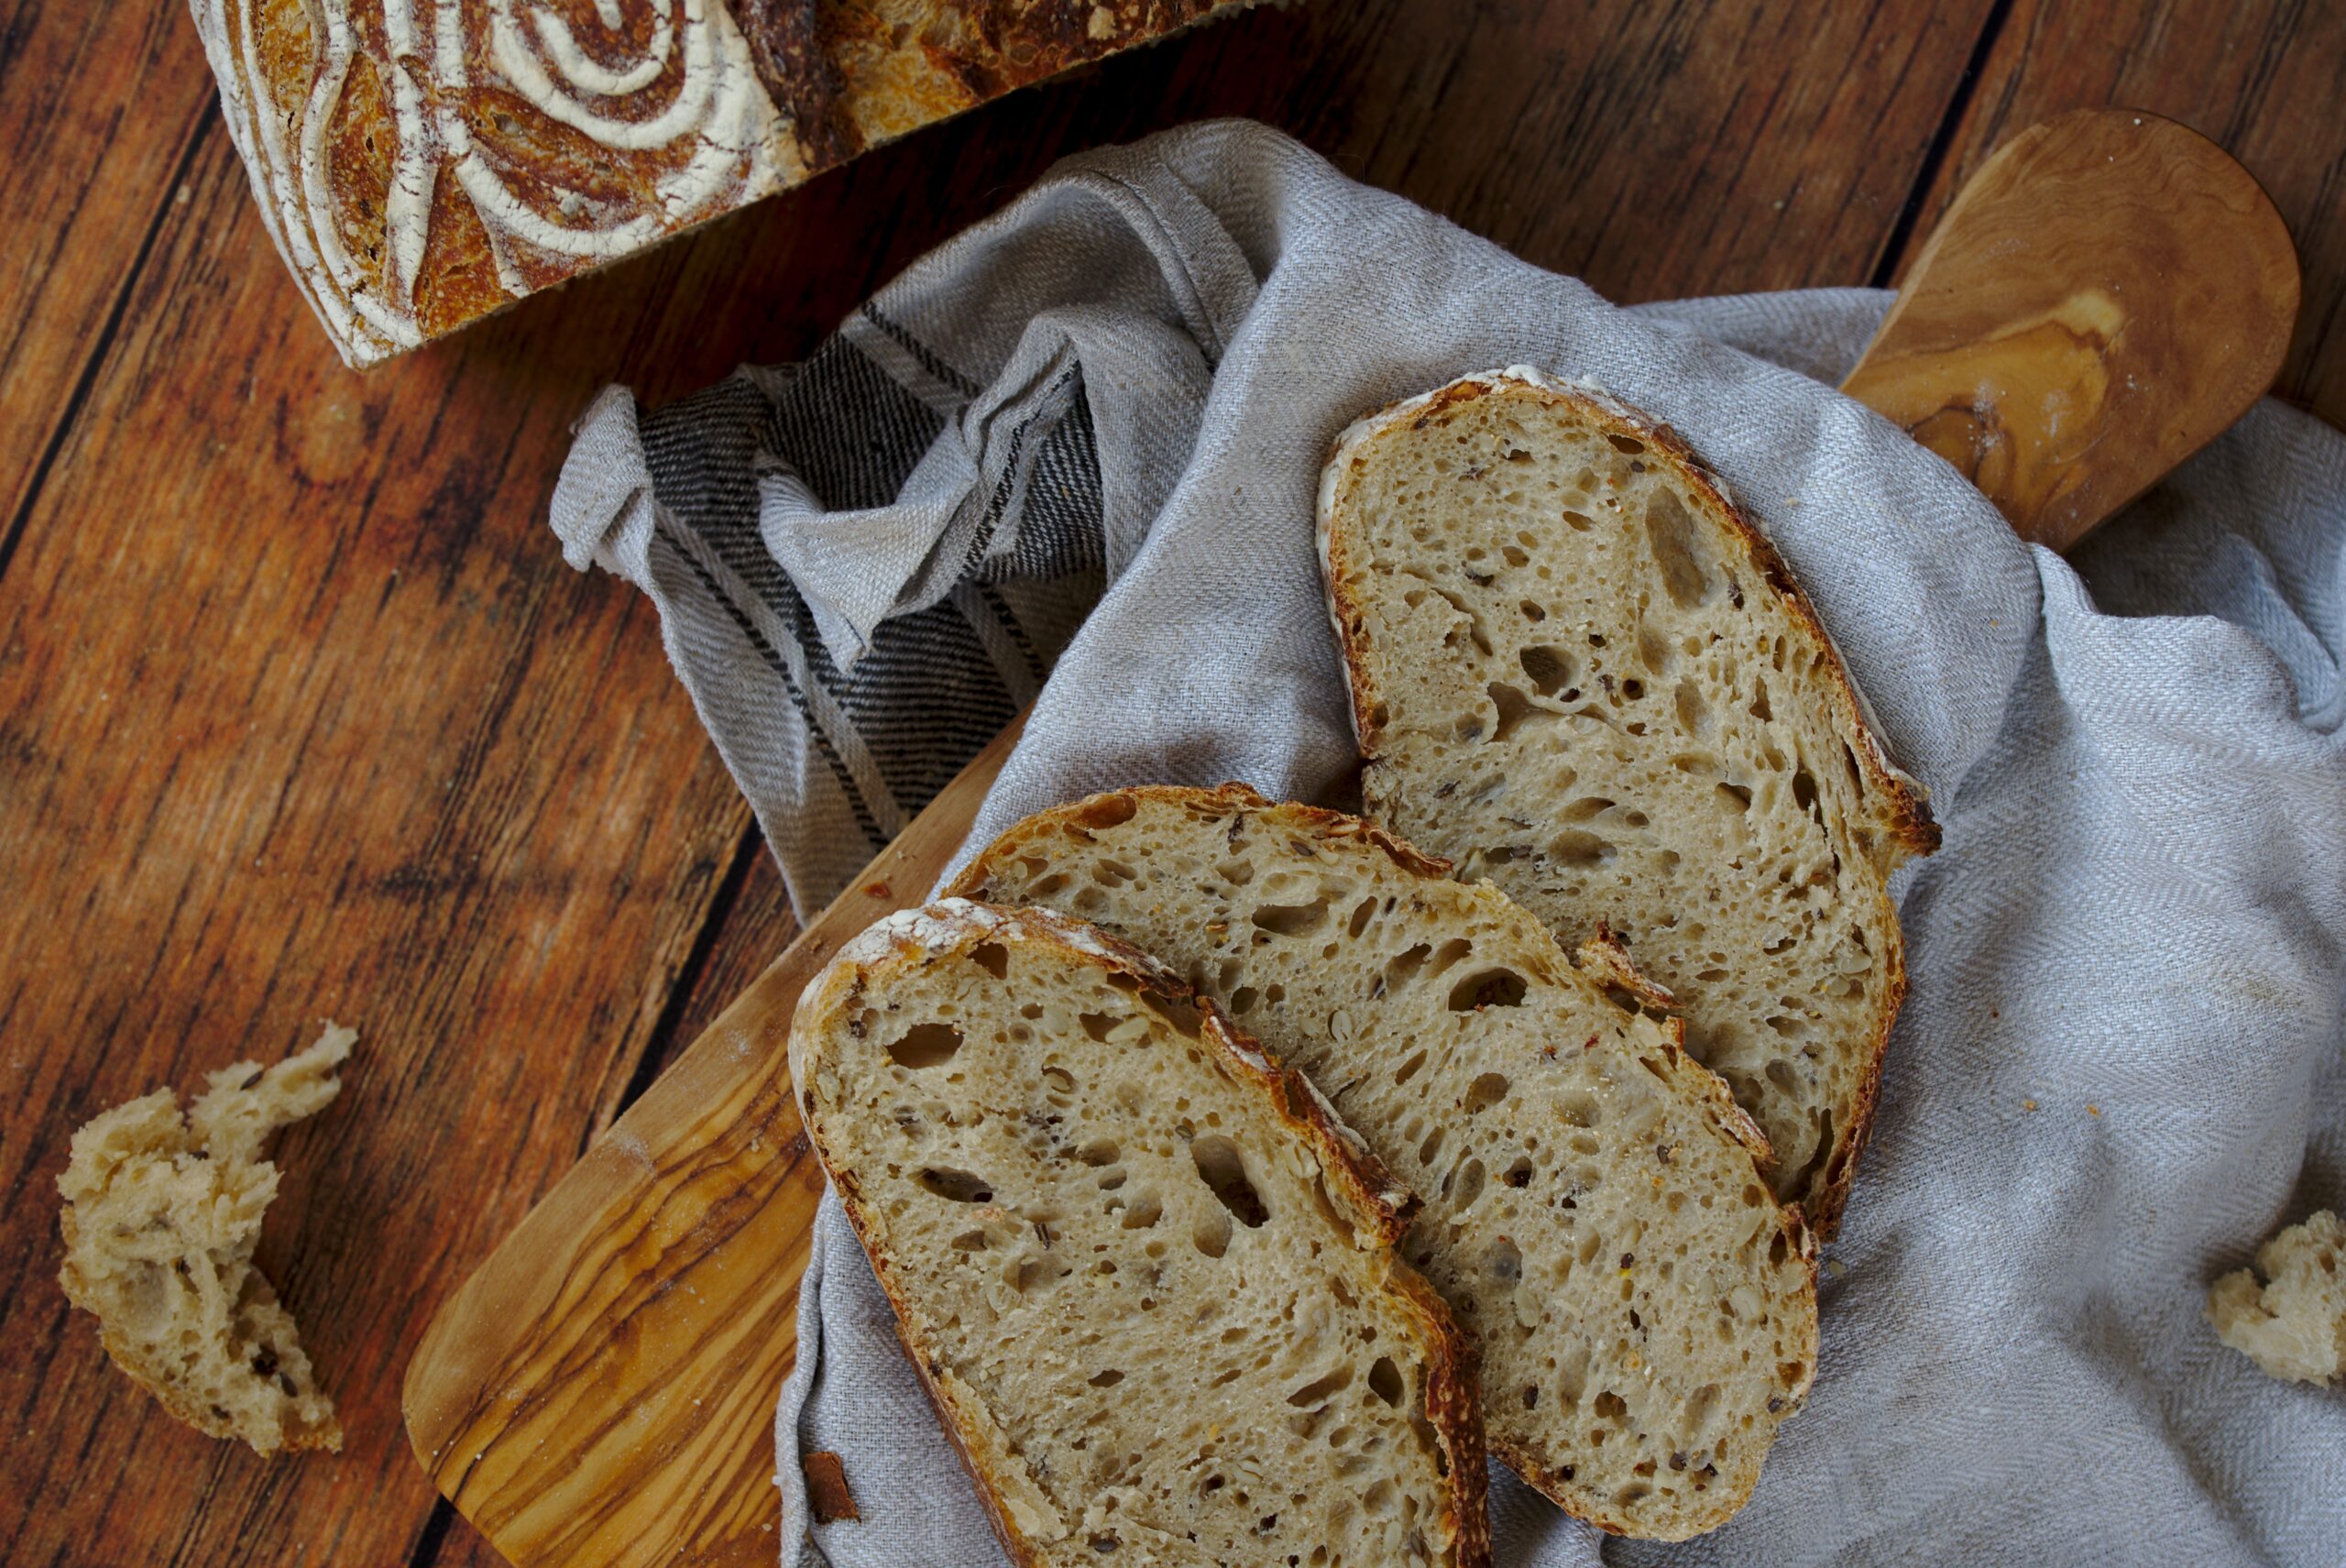
Once the bread is baked, it’s important to let it cool for 3-4 hours, to allow it to finish baking and cool. This is what creates that nice crumb, chewy your going for in a loaf of bread.
Ingredients
Equipment
Method
- Combine 60g of flour and 60g of room temperature water in a glass jar. Stir with a chopstick until no dry patches of flour are left. Scrape down the sides with a rubber spatula
- Let sit at room temperature for 24-48 hours, or until you begin to see the mixture bubbling.
- Add equal parts of the starter, flour, and room water, stir with chopstick to combine, and let sit 12-24 hours.
- Once the mixture has doubled, discard half. Add equal parts of the starter, flour, and room water. Stir to combine.
- Repeat for 7 days. Perform a float test when the starter is at it's height. Add a teaspoon of starter to a glass of water. If it floats, it's ready to be used. If not, continue until it passes the test.
- Add the starter to the water and stir until it's broken up.
- Add the flour and stir until combined. Cover with plastic wrap and let sit at room temperature for 8-12 hours.
- The leaven should smell like vinegar and the bubbles on the surface should have broken, add to the water. Stir until broken up.
- Add the flours and mix until a dough forms and there is no dry patches remaining. Cover and let sit for at least 30 minutes.
- Sprinkle the salt over the surface of the dough. Then pinch the dough, incorporating the salt into the mixture.
- With wet hands, gently release and lift the edges of the dough from the bowl and pull them into the middle. Cover and let sit for 30 minutes.
- Gently grabbing the dough from the middle section, lift until it detached from the bowl. Perform the first coil fold, ensuring that the ends of the dough are now tucked under the middle.
- Repeat every 30 minutes for the next 4-5 hours or until the dough is slightly puffed.
- At the end of the bulk fermentation, gently pull the dough out onto a lightly floured work top. Starting from the top, stitch the dough together, pulling it into the middle from both sides of the dough alternating.
- From one end, roll the dough up to create tension. Flip over, placing it on a generously floured worktop. Let rest for 15 minutes.
- Flip the dough back over, seam side facing up. Stitch up the dough once more, then roll from one end to the other to create tension.
- Transfer to a well floured proofing basket, keeping the seam side up.
- Cover the basket with a kitchen towel, then place in a plastic bag. Use a chip clip to close the bag and place in the fridge overnight.
- Place the dutch oven in the oven and preheat to 250°C (480°F) and let heat for an hour.
- Take the dough out of the fridge and uncover. Cover the top of the basket with a sheet of parchment paper and gently flip the dough out onto the parchment paper, seam side down.
- Brush off the excess flour from the dough. With a sharp knife or scoring razor, score the top of the loaf about 3mm (1/8 inch) deep.
- Transfer parchment paper and dough to the dutch oven. Cover and let bake for 25 minutes.
- After 25 minutes, remove the lid and bake for an additional 25 minutes.
- Remove the dutch oven and transfer the bread to a cooling rack. Let the loaf cool for a couple hours before cutting into it. This allows the interior to continue cooking and develop nice air pockets.