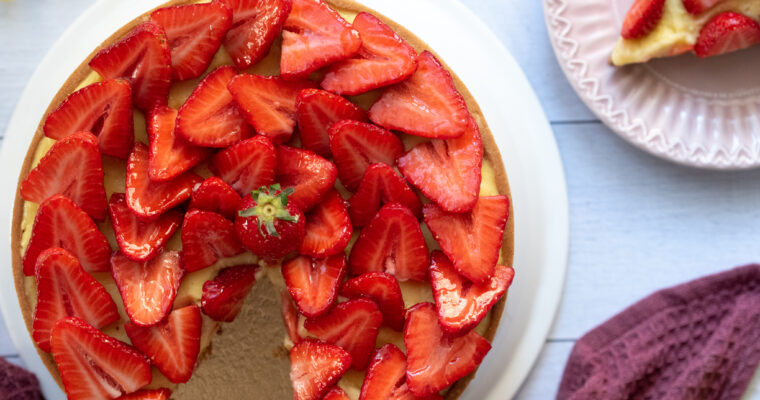
You asked and I’m answering! A couple weeks ago, I asked if there was anything that you all wanted to see more of. The most common request was more fresh fruit based desserts, now that we’re going into the warmer seasons. So this easy raspberry tart is the first of many recipes that I have in store for you!
When it comes to fruit tarts, I am a firm believer in letting the fruit be the star of the show! After all, they’re not available all year around are they? I am a huge strawberry lover, but raspberries are a close second. Unless you have homemade blueberry syrup like my dad used to make for pancakes that is….
Pastry Dough
The crust for this easy raspberry tart is made out of sweet pastry dough or ‘pâte sucrée’. The process is the same as many other tart dough. Sweet pastry dough is a bit more fragile than other tart dough, but is the perfect base for any fresh fruit based tarts! It really reminds me of eating sugar cookies!
The powdered sugar and butter will be creamed together, then you add the whisked egg. You then add the dry ingredients and mix until just combined. After letting the dough rest in the fridge, it is rolled out before lining your pan.
I like to let it sit in the freezer for a bit, to help it hold it’s shape during baking. As my filling for the tart is simply pastry cream, the tart shell is blind baked, then left to cool completely until you need it.
Cream Filling
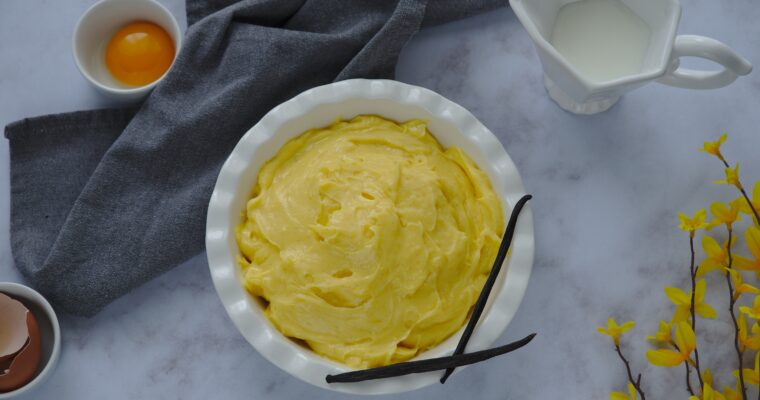
As you know, pastry cream or crème pâtissière is the ONE base that everyone should know. If you can make a good homemade pastry cream, you can use it for quite literally anything! However, since this easy raspberry tart has very few components, I’ll let you in on a little secret.
You want all of your components to shine, which in the end will create a fabulous, fresh, dessert! So here’s my tip. Use a vanilla bean. There are some times when you can get away with using vanilla extract. This is not one of them. Other than the fresh raspberries, the pastry cream is going to be used to make the crème diplomate aka your understudy. By using a vanilla bean, you’ll be sure to have an excellent vanilla pastry cream that tastes like something else than eggs.
To make sure that my pastry cream has as much flavor as I can give it, I scrape the grains from the bean then but them in the milk that you heat up on the stove top. I also throw the left over bean in the milk. As the milk heats up, it pulls the flavors from the bean itself and those extra grains that you may have missed are also released into the milk. Just be sure to remove the bean before whisking the milk into the eggs. They’ll just get in the way!
Once the pastry cream has cooled, you’ll need to loosen it up with a whip (or in the mixer), then fold in homemade whipped cream. This results in a light yet flavorful layer of crème diplomate that your fruit will going to rest upon.
Easy Raspberry Tart
Ingredients
Equipment
Method
- Cream the butter and powdered sugar together until smooth.
- Disolve the salt into the egg, then add to the butter mixture. Mix until combined. Be sure to scrape down the sides of the bowl, so you won't have chunks of butter later on. It may looked curddled, that's okay.
- Add the flour, then mix until just combined.
- Dump out onto a clean working space. With the palm of your hand, push the mixture away from you and against the worktop. Repeat 2-3 times.
- Pull the dough back together and repeat the process 2-3 times. The goal of this is to create a smooth dough, without any hidden chunks of butter or flour lumps.
- Pull into a ball, wrap in plastic wrap and let chill in the fridge for at least 30 minutes
- After the dough has chilled, rolled out into a circle about two finger widths larger than your pan. Trim excess dough.
- Roll the dough up on your rolling pin and transfer to the pan. Start working the dough into the corners of the pan, then trim the excess dough from the top of the pan using a paring knife.
- Dock the dough, then cool in the freezer for 15 minutes
- Preheat the oven to 180°C (350°F). Bake the tart crust for 20 minutes or until golden brown. Check on the crust about half way through baking. If you noticed that the center has domed, poke it with a fork so you have a flat bottom.
- Let cool for 30 minutes.
- Put the whisk & metal bowl in the freezer to chill until later.
- Soak the gelatin sheets in cold water for 15 minutes
- Prep a shallow casserole with plastic wrap. Overlap two sheets of plastic wrap leaving excess on both ends, so you can cover the cream afterwards.
- In a sauce pan, add the milk and half of the sugar. Add the vanilla extract or vanilla grains/bean. Bring to a boil.
- In a medium sized bowl, add the egg yolk and remaining sugar. Whisk until combined and lightened in color.
- Add the crème à poudre or corn starch and whisk until combined.
- When the milk comes to a boil, take off the heat and discard the vanilla bean. Pour 1/3 of the milk on top of the egg mixture, whisking constantly. This tempers the mixture.
- Pour the egg mixture into the saucepan with the remaining milk, whisking non-stop.
- Turn the heat back on to medium and continue to stir without stopping. After a couple minutes, the cream will start to thicken. Add the gelatin and whisk until dissolved.
- Continue to cook for an additional 3 minutes, then strain the cream into the casserole.
- Let cool for a couple minutes, then fold in the excess plastic wrap over the cream, making sure it's in contact with the cream (this will keep it from creating a crust). Transfer to the freezer for 10 minutes, then move to the fridge to continue cooling for about another 30 minutes.
- Once the pastry cream has cooled, transfer it to a bowl and whisk it until it has loosened up and smooth.
- In the chilled mixing bowl, add the heavy cream and whip until you have a semi stiff peaks.
- Add 1/3rd of the whipped cream to the pastry cream, gently folding until fairly well combined. Continue with another third of the whipped cream then finish off. Fold until thoroughly combined and smooth.
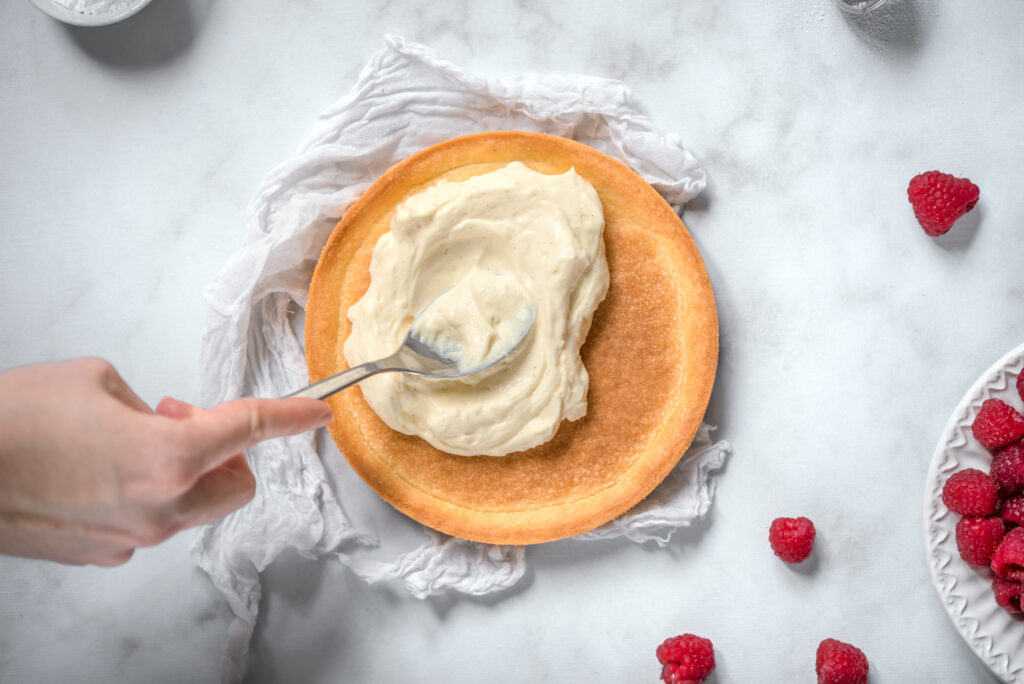
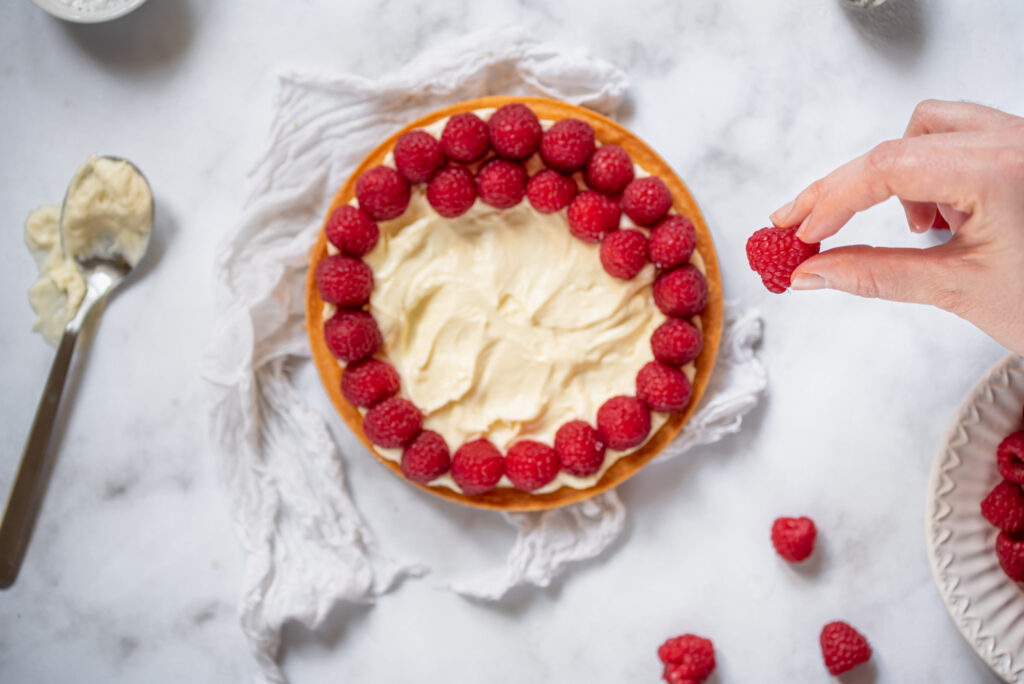
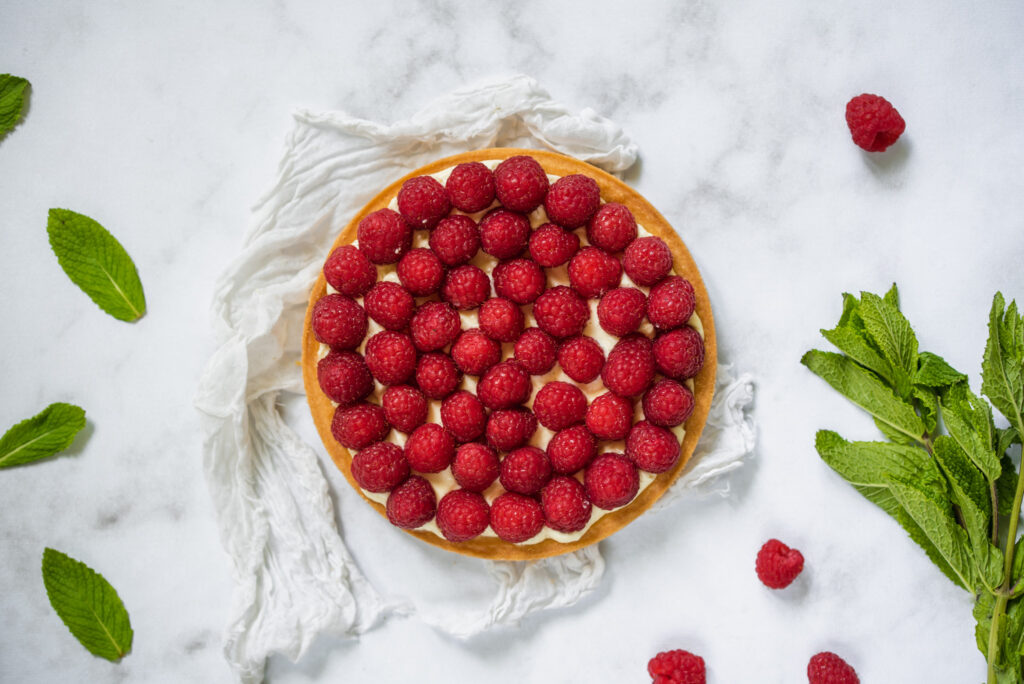
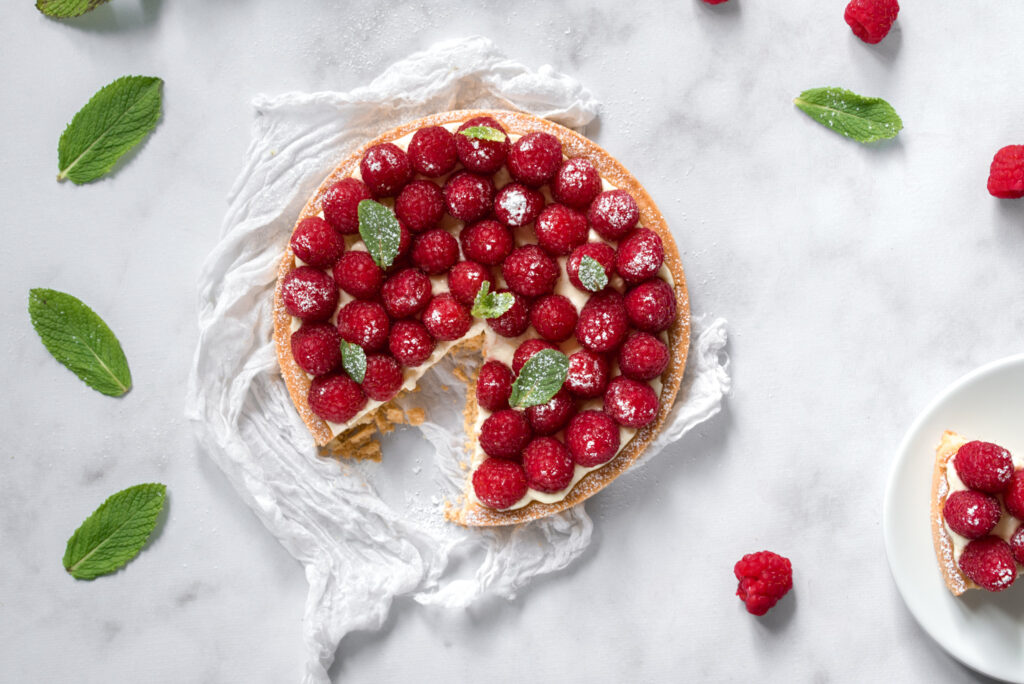
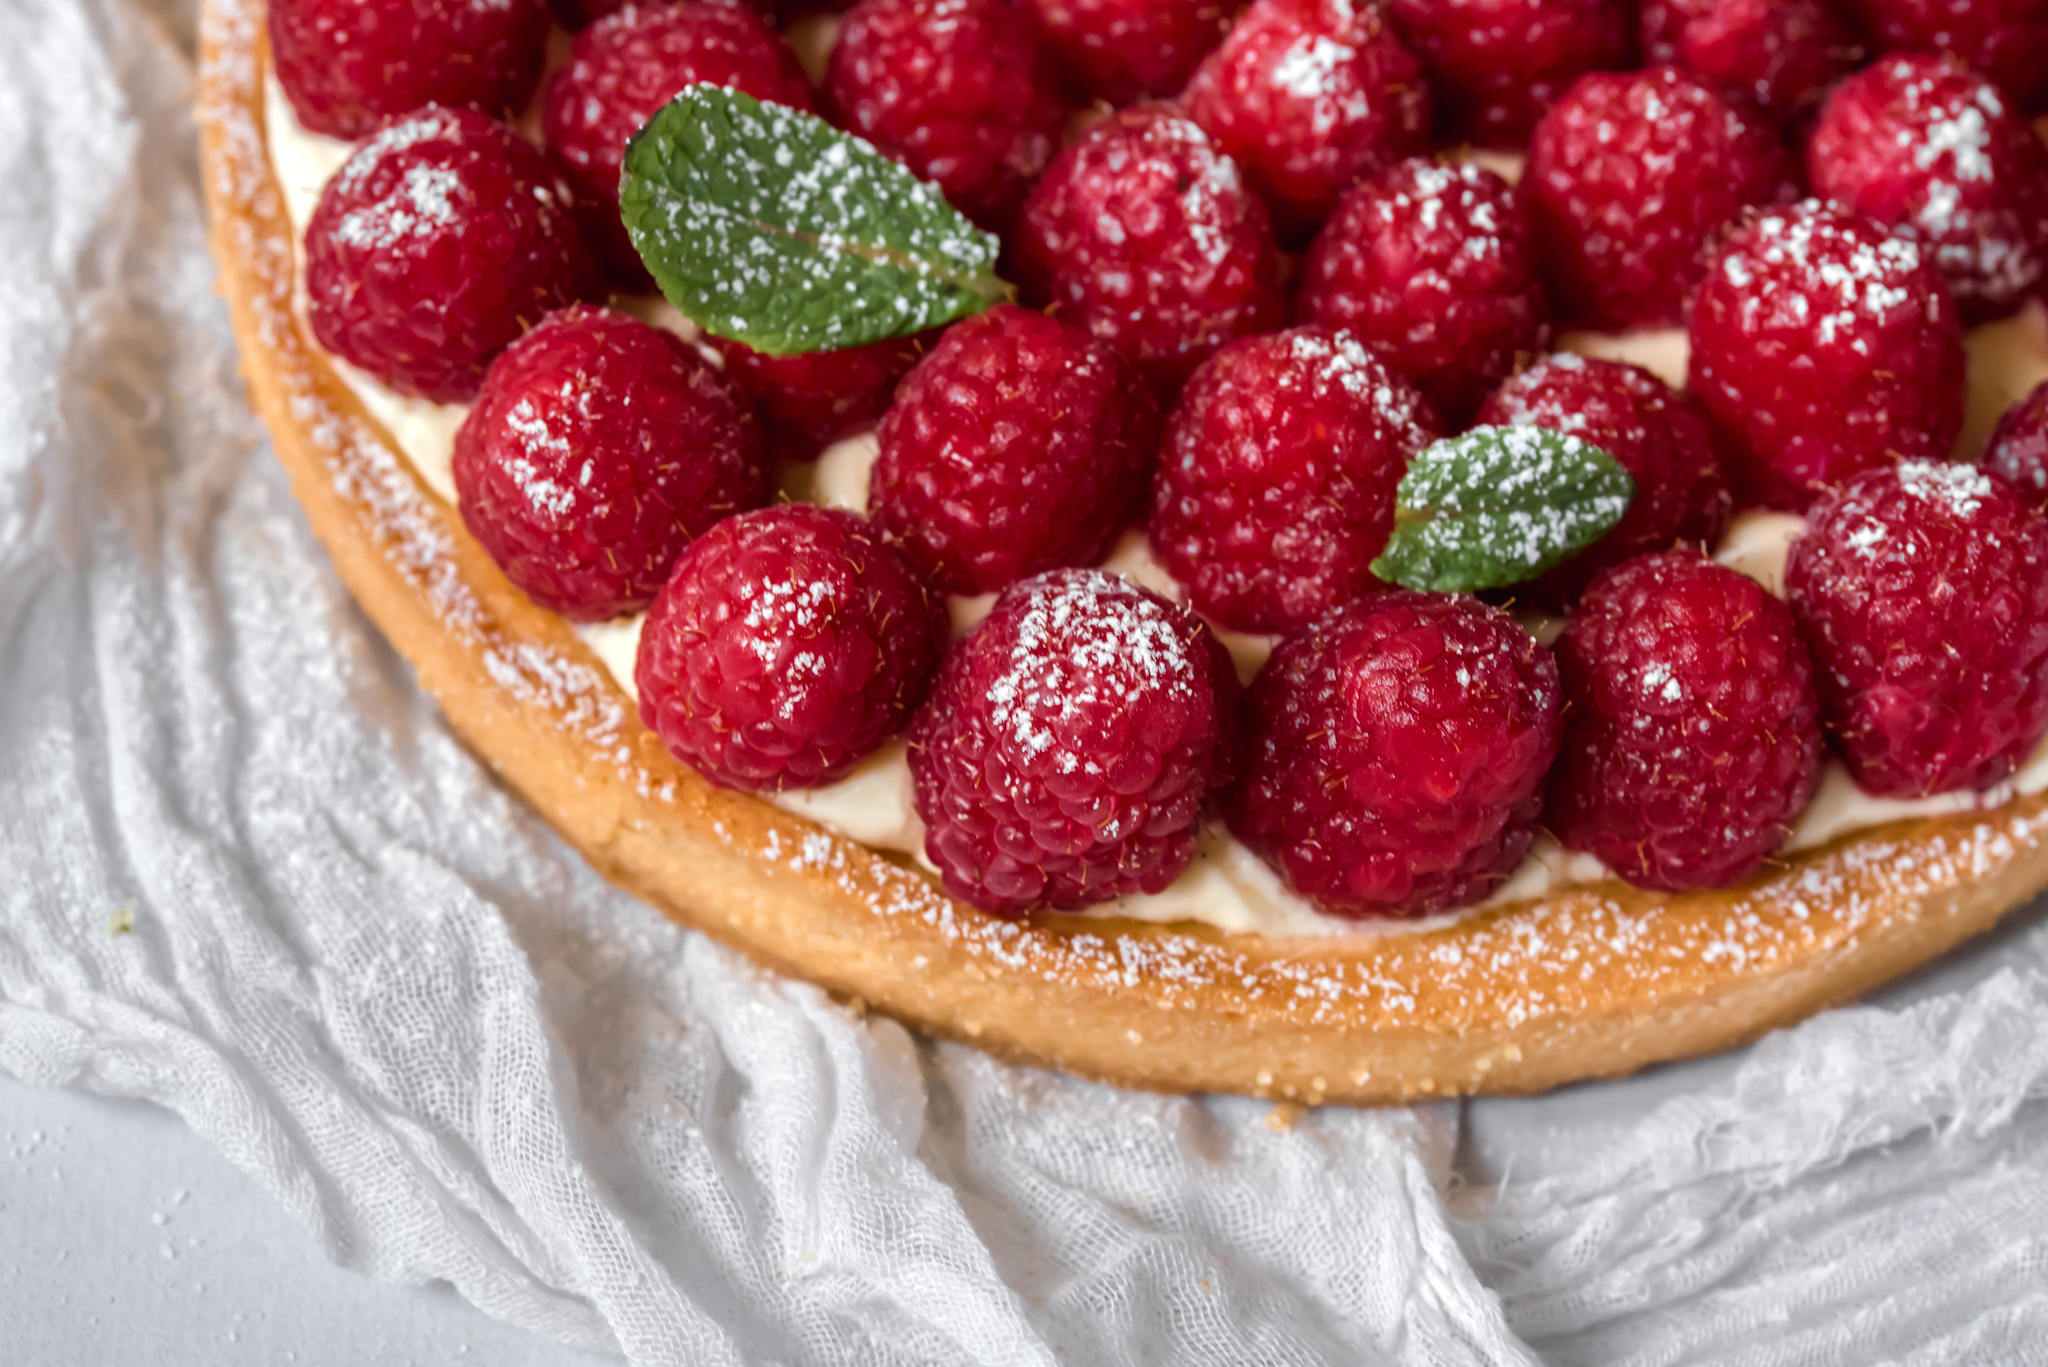
- Fill the tart shell with a nice layer of diplomat cream.
- Top the cream with the berries, then brush a light layer of nappage neutre or jelly on top of the berries or sprinkle with powdered sugar.
- Chill until ready to serve and enjoy!